
Getting Started
This guide takes you through the whole journey once: create a page, design it in the editor, and publish it to a live address. Follow it in order and you will have a real website by the end.
1. Go to your dashboard
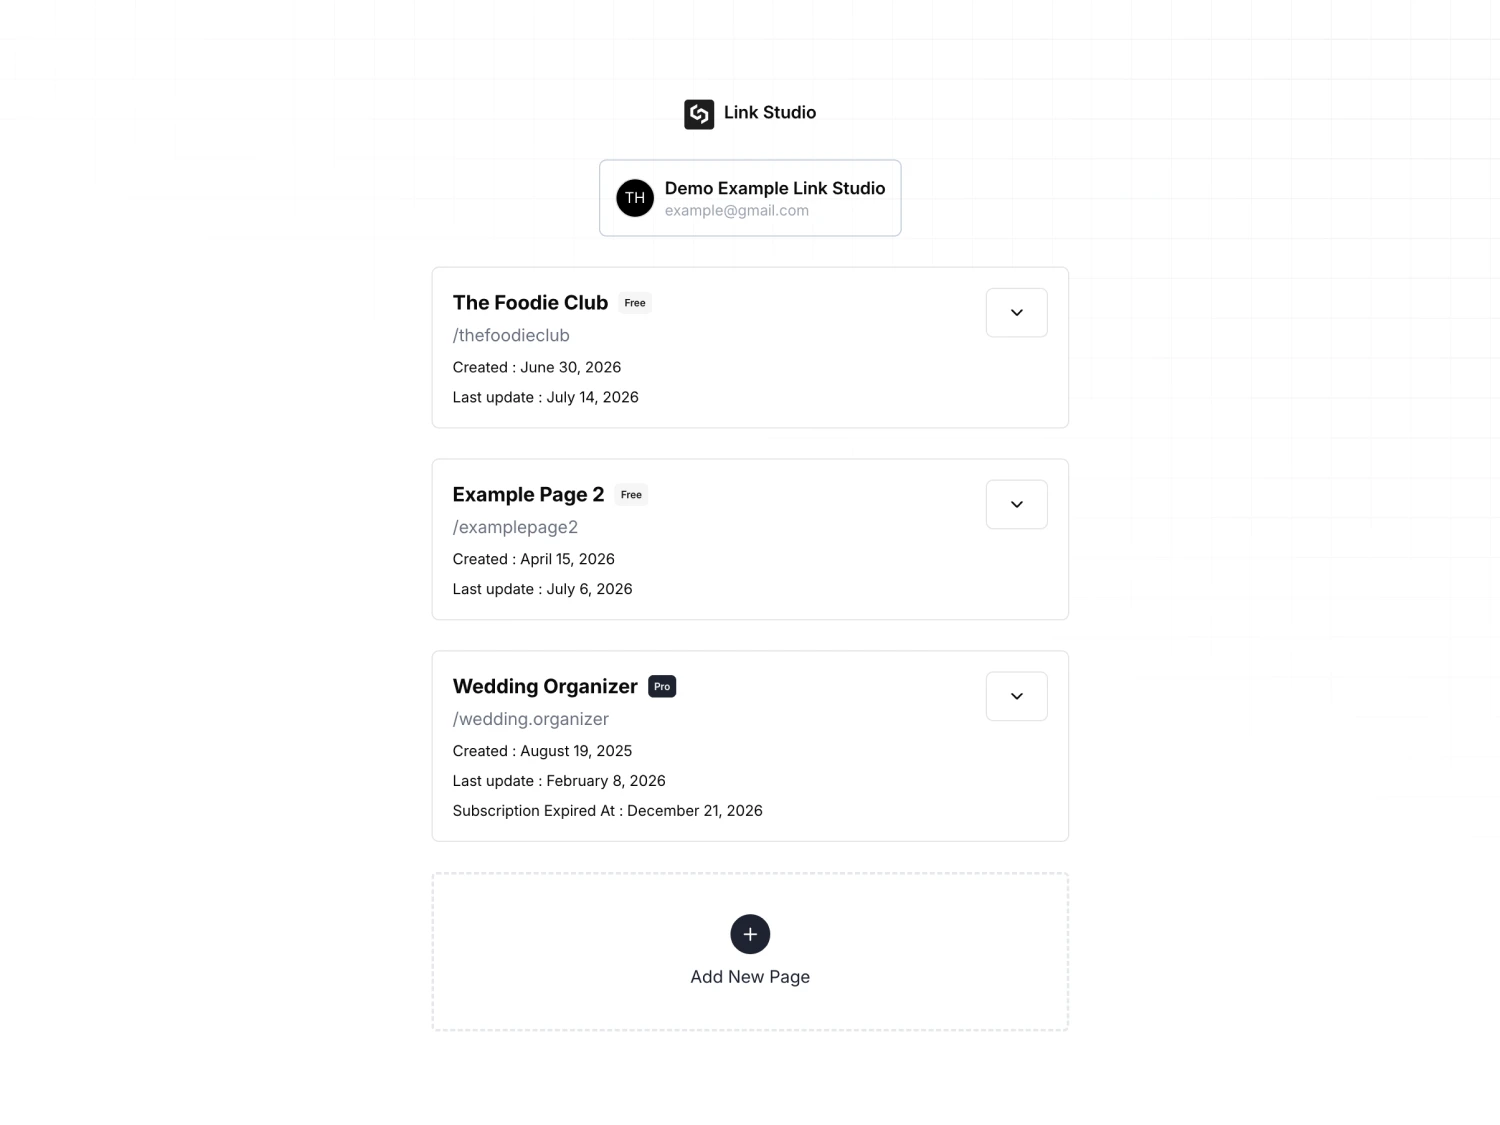
Sign in and open your dashboard. This is your home base, where all of your pages live.
2. Create a page
Click Create a page (or Add New Page). Give it a name and a link path. The link path is the address your page will live at, so keep it short and memorable.
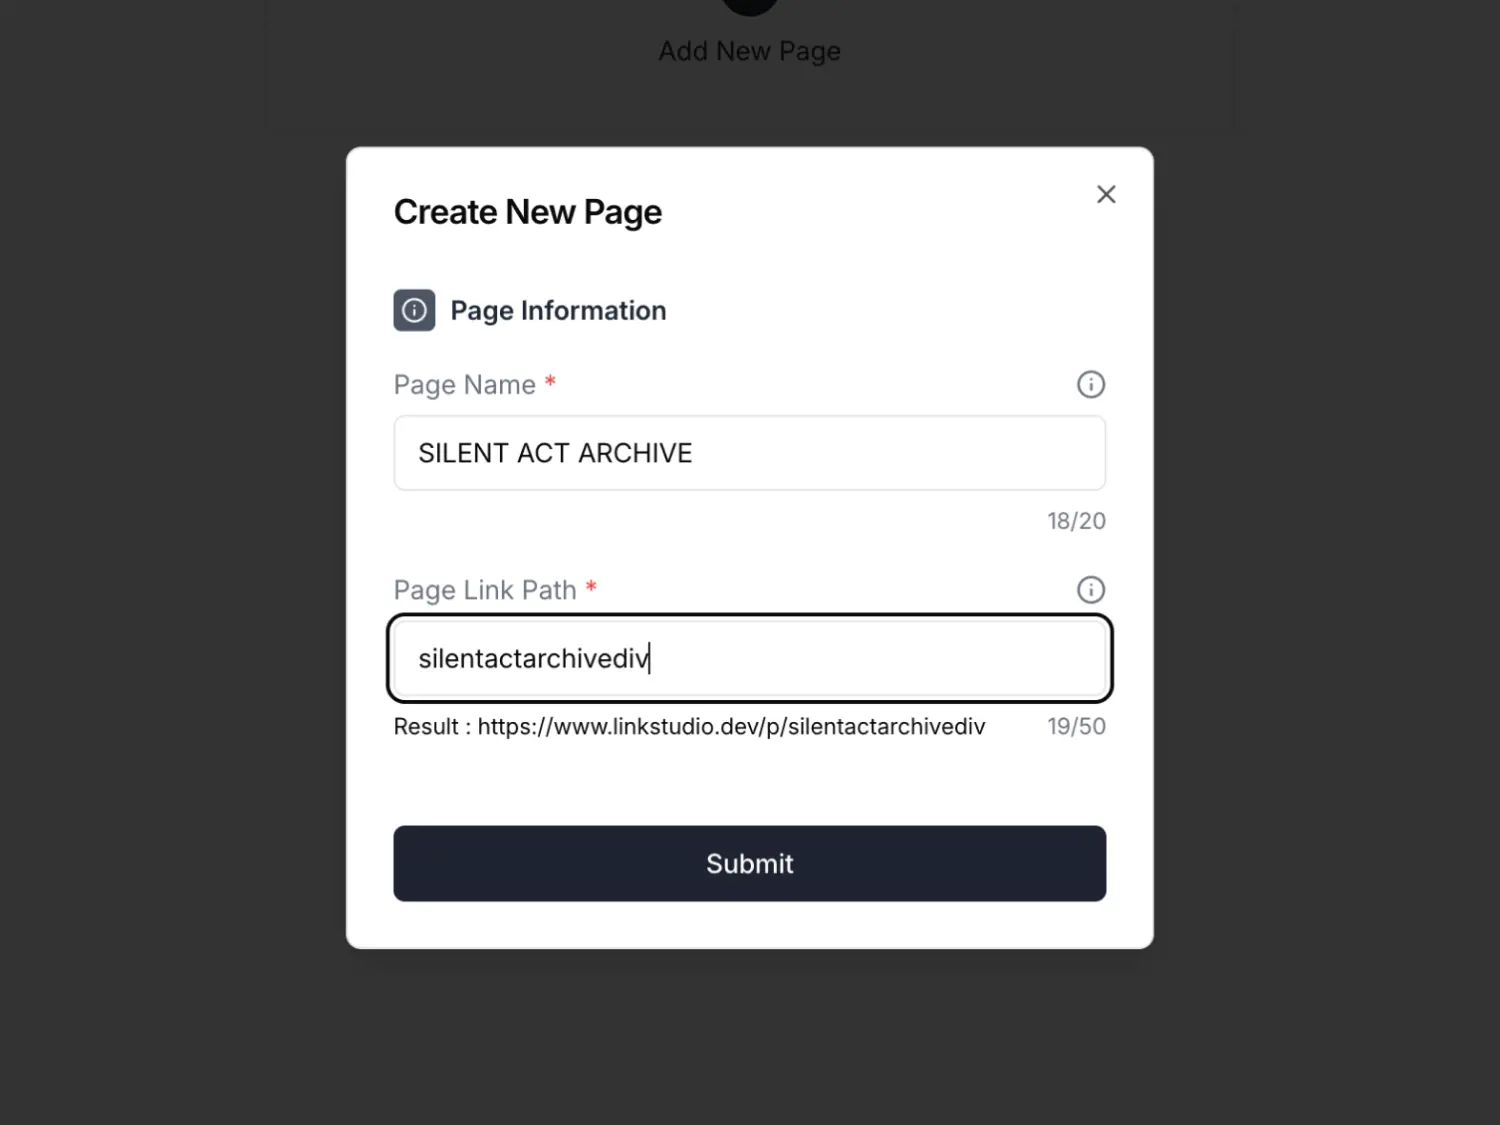
The page name is just for you, so you can tell your pages apart. The link path is public and becomes part of your page's web address, so choose it with care.
3. Get to know your dashboard
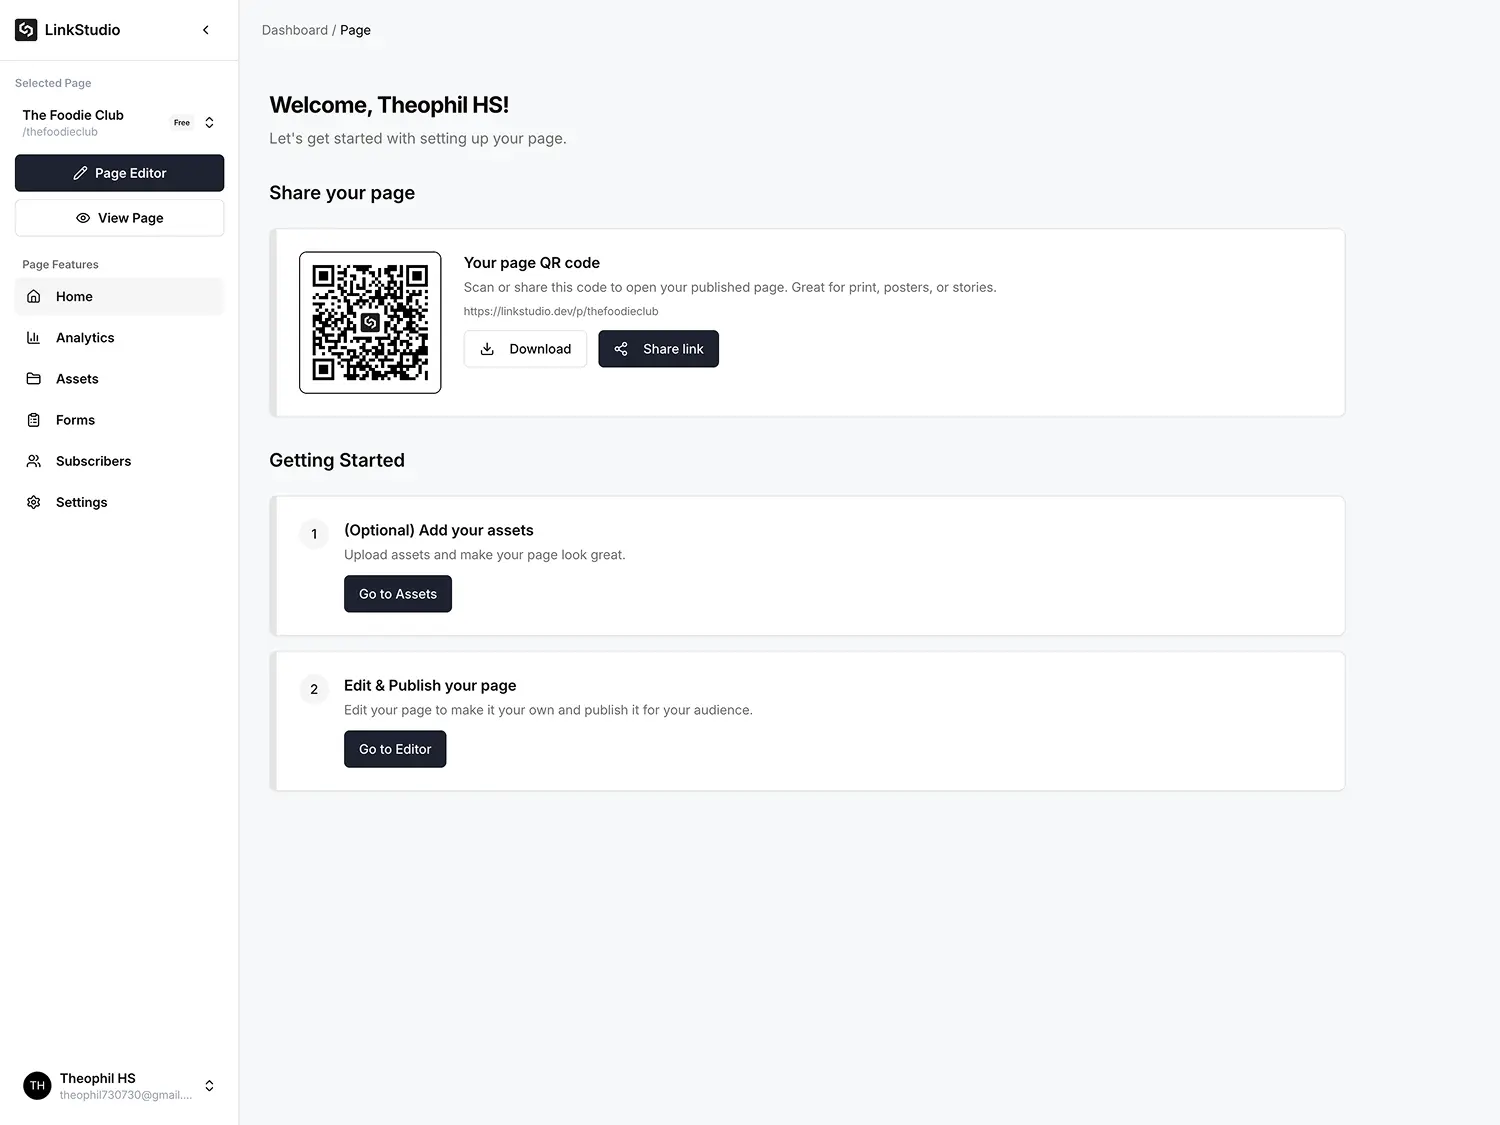
Once the page is created, you land on its dashboard. From here you can open the editor, view the live page, manage assets and forms, and change settings.
4. Open the editor
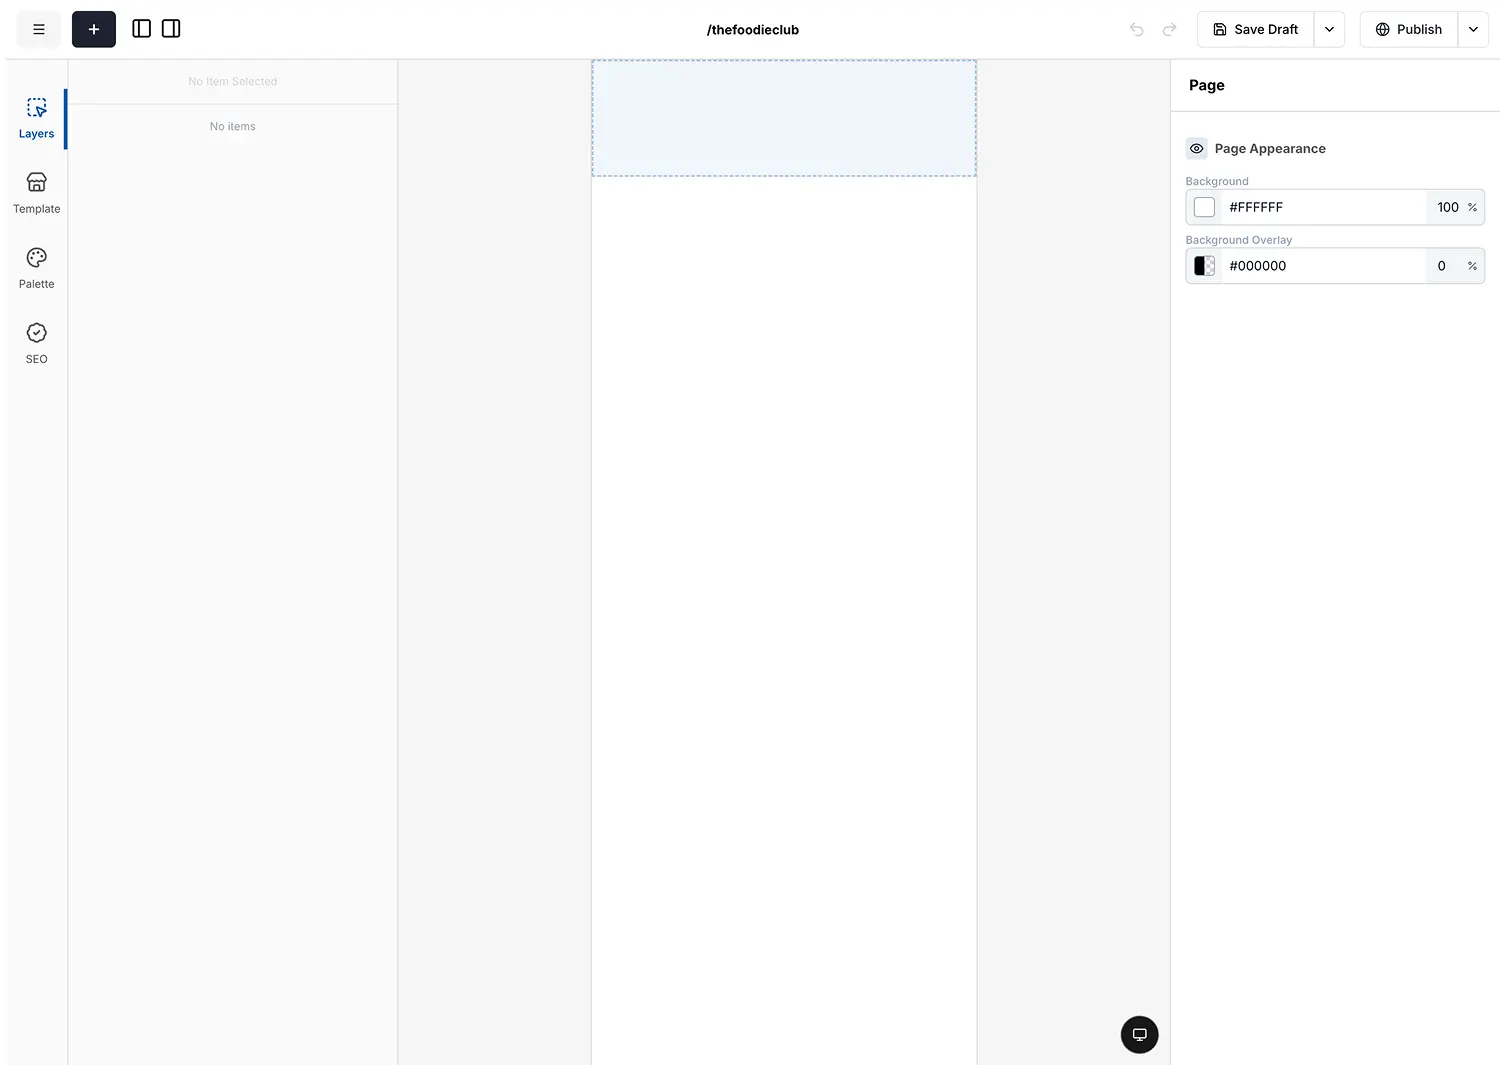
Click Page Editor to open the visual editor. The middle is your canvas. The Insert button adds new blocks, and the Fields panel on the right shows the settings for whatever block you have selected.
5. Apply a template
The fastest way to start is with a template. Pick one you like and apply it. The whole layout drops onto your canvas, ready to make your own.
6. Change the text
Select any text on the canvas, then edit its words in the Fields panel on the right. Work through the template and replace the placeholder copy with your own.
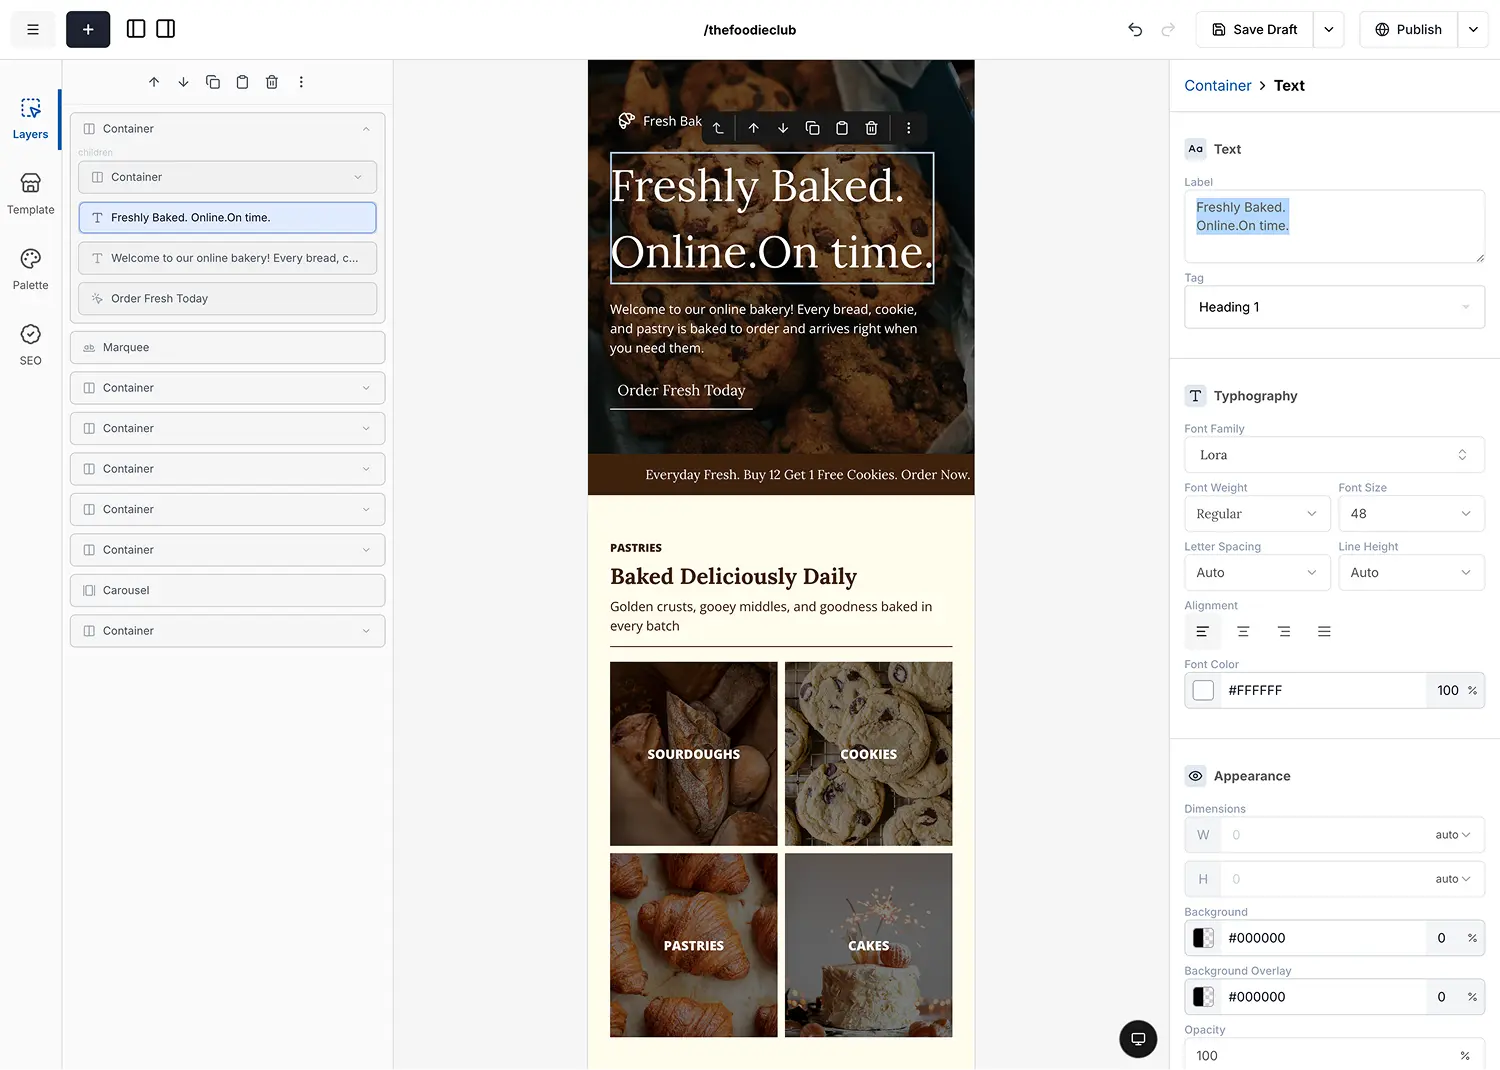
Click a block once to select it. The Fields panel on the right always reflects the block that is currently selected.
7. Add a new section
Want more than the template gives you? Open the Insert menu (the plus button, or press ⌘ /) to add a new block, and choose where it goes. See Adding Components for the details.
For a fuller, worked example of building a section from scratch, follow Making a Fashion Page.
8. Save your draft
Press Save to store your work as a draft. A draft is private. You can leave and come back, and your changes will be waiting for you.
Saving does not change your live page. A draft is private to you, so visitors will not see any of your changes until you Publish (the next step). For the full difference, see Understanding Draft & Live Page.
9. Publish
When you are happy, press Publish. This copies your draft to the live version of your page, so anyone with the link can see it.
10. View your website
Open your page's link (or press View Page) to see it live, exactly as your visitors will.
Publishing is not final. Make more changes in the editor whenever you like, then Publish again to push them live.
Next: a worked example
Now that you know the flow, follow Making a Fashion Page to build a real, multi-section page from scratch. It introduces one new technique per section, so it is the fastest way to get comfortable with the blocks.